GAMERSMENTOR

Facebook Twitter Instagram Youtube
  • Home
  • Anime
  • Guides
    • Call of Duty
    • Fortnite
    • Wordle
  • Hardware
  • News
  • Reviews
Reading: Anedamimik Shrine Guide and Location in Zelda: Tears of the Kingdom
Share
Gamers MentorGamers Mentor
Font ResizerAa
Search
  • Home
  • Anime
  • Guides
    • Call of Duty
    • Fortnite
    • Wordle
  • Hardware
  • News
  • Reviews
© Gamersmentor. All Rights Reserved.
Gamers Mentor > Guides > Anedamimik Shrine Guide and Location in Zelda: Tears of the Kingdom
Guides

Anedamimik Shrine Guide and Location in Zelda: Tears of the Kingdom

Bilal Gondal
Last updated: 2023/12/29 at 8:04 PM
Bilal Gondal
3 Min Read
Anedamimik Shrine Zelda
Highlights
  • Anedamimik Shrine is located east from the Necluda region, situated directly east of the Hateno Ancient Tech Lab.
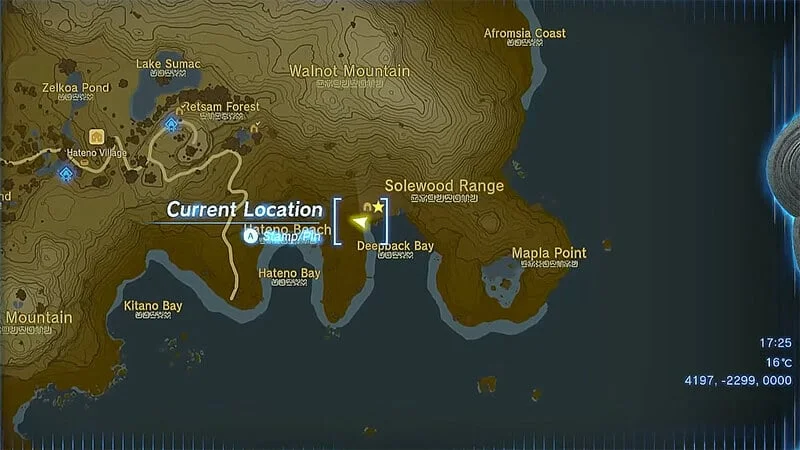
  • The Anedamimik Shrine is underground; locate the cave entrance at coordinates 4213, -2263, 0001

Looking to complete the Anedamimik Shrine in Tears of the Kingdom? While exploring the game world, you’ll discover valuable items in Shrines, including weapons and the Light of Blessing. However, before reaping these rewards, you’ll have to tackle puzzles, as is the case with the Anedamimik Shrine. Keep reading to understand how to successfully navigate through Anedamimik Shrine in Zelda: Tears of the Kingdom.

Anedamimik Shrine Location in Zelda: Tears of the Kingdom
Anedamimik Shrine Zelda

To locate the Anedamimik Shrine, head east from the Necluda region. It’s positioned directly east of the Hateno Ancient Tech Lab. However, because the Shrine is underground, you’ll have to find the entrance to the cave. Follow these coordinates:

4213, -2263, 0001

You will come to Deepback Bay Cave. There will be a number of adversaries inside, but they are easily defeated. On the other hand, you will discover the Shrine is partially submerged when you arrive. As a result, you have to defeat Like Like in the bottom cave. Beneath this worm, you will discover breakable rocks. In order to divert water away from Anedamimik Shrine, break them.

How To Complete A Retraced Path in Zelda: TOTK

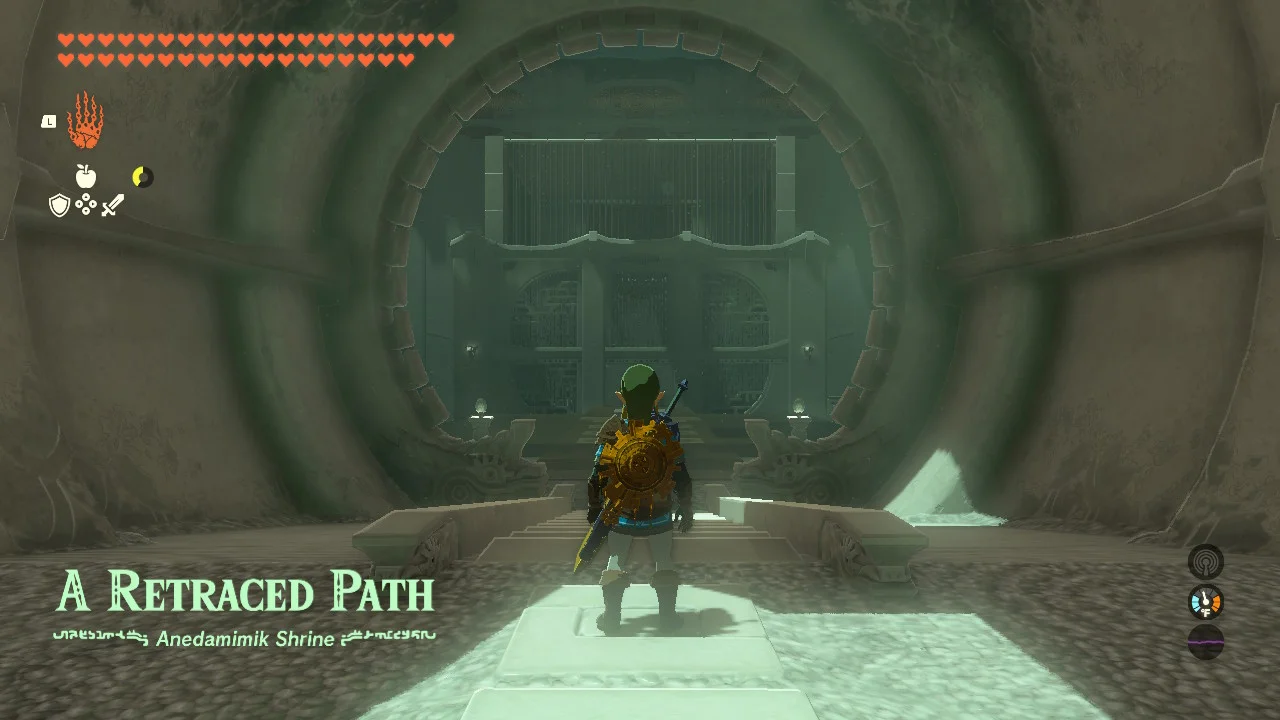
Even though this Shrine is skillfully concealed, it doesn’t fall under the category of Rauru’s Blessing, meaning you must solve an internal puzzle to earn the reward. Additionally, the Treasure Chest is cleverly tucked away.

Unlock Utojis Shrine in Zelda Tears of the Kingdom

To successfully finish the Anedamimik Shrine in Zelda: Tears of the Kingdom, follow these straightforward steps:

  1. Leap to the right and maneuver under a series of blocks.
  2. Utilize your Ascend ability to reach the Treasure Chest, where you’ll discover a Large Zonai Charge.
  3. Next, activate the crystal at the Shrine’s entrance, causing the Sphere to descend on the right.
  4. Employ your Recall ability on the Sphere to bring it back.
  5. This action opens the door to the Shrine exit, allowing you to claim the well-deserved Light of Blessing.

That covers the essentials on completing the Anedamimik Shrine in Zelda: Tears of the Kingdom. The puzzle is relatively uncomplicated, so you should swiftly navigate through it.

Final Verdict

In conclusion, conquering the Anedamimik Shrine in Zelda: Tears of the Kingdom unveils hidden treasures and challenges. From locating the Shrine east of Necluda to navigating Deepback Bay Cave, the step-by-step guide ensures a smooth journey. The internal puzzle and concealed Treasure Chest add depth to the experience, guiding you to claim the coveted Light of Blessing. Armed with these insights, triumph over the Shrine’s challenges and explore the enchanting world of Tears of the Kingdom.

You Might Also Like

How to Use Gift Codes in Whiteout Survival

How to Change Your Name in Overwatch 2

How to Complete Accidental Generosity in Destiny 2

How to Unlock Competitive in Overwatch 2: A Friendly Guide

Baldur’s Gate 3 Selune Chest Complete Guide

Bilal Gondal December 29, 2023 December 29, 2023
Share This Article
Facebook Twitter Email Print
By Bilal Gondal
Follow:
Bilal Gondal stands out as an exceptional figure in the gaming community. Beyond organizing tournaments, he is a seasoned professional in Counter-Strike: Global Offensive (CS:GO). Bilal not only excels in gameplay but also shares his expertise through well-researched articles and strategic game guides, with over 1600 articles ranking on Google.
Hardware
hyperx cloud core
Hardware

HyperX Cloud Core Review: Balancing Quality and Affordability

Logitech G PRO X 2 Lightspeed
Hardware

Logitech G PRO X 2 Lightspeed Wireless Gaming Headset Review

Glorious Model O- Review
Hardware

Glorious Model O- Wireless Review | Precision To KILL!

how-to-use-virtual-keyboard-in-reaper
Hardware

How to use Virtual Keyboard in Reaper

Lenovo Legion Go Review
Hardware

Lenovo Legion Go: An In-Depth Review

Razer Viper Mini Review
Hardware

Razer Viper Mini Review | Small Yet LETHAL!

You Might Also Like

gift codes whiteout survival
Guides

How to Use Gift Codes in Whiteout Survival

July 1, 2025
changing name in overwatch
Guides

How to Change Your Name in Overwatch 2

June 30, 2025
accidental generosity destiny2
Guides

How to Complete Accidental Generosity in Destiny 2

June 29, 2025
unlocking competitive in overwatch2
Guides

How to Unlock Competitive in Overwatch 2: A Friendly Guide

June 28, 2025

Follow Us on Social Media

Youtube Instagram Twitter Facebook
  • Contact Us
  • Privacy Policy
  • About Us

GAMERSMENTOR

More Information

  • Contact Us
  • Privacy Policy
  • About Us

Copyright © 2024 - Gamers Mentor | All Rights Reserved

Welcome Back!

Sign in to your account

Lost your password?